Overview of GameReady Rigs and Export Script
Numerous AnimRig's are Game Ready, which means they are setup to export their animation skeleton to and FBX file to be brought into a game engine like Unity or Unreal and applied to the character. While this works for both Unity and Unreal, it should also work for other engines that accept FBX formats for animation.
You can tell which characters are Game Ready a few ways:
1. The Game Ready Icon
2. The Game Ready tag in the promotion images (shown above under the header)
3. A variant of the rig called (rigName)_GameReady.ma
4. A provided FBX file (rigName)_Char.fbx
If a rig has these components, then they're good to go. If a character is missing these, than they are not currently setup to be exported to a game engine. Hopefully all the AnimRigs will be Game Ready in the future.
To simplify the process of getting your animation out of Maya and into a usable format, I've created an Animation Export Script you can download Here. This script works with all Game Ready characters, so you'll only need to purchase it once.
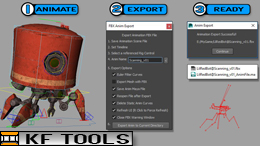
1 Click Anim to FBX Export
- Download
Unpacking and Prepping scene for Export
So now that you have a Game Ready AnimRig and the Animation Export Script, let's get started.
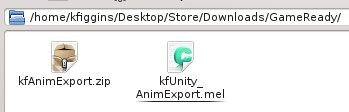
1. Download the kfUnity_AnimExport script Here
2. Unzip the file to reveal the kfUnity_AnimExport.mel script
3. Open Maya
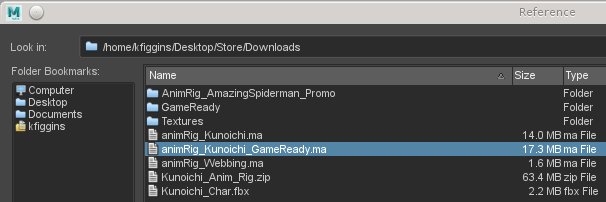
4. Reference in a *_GameReady.ma AnimRig (steps covered in Quick Start Guide)
**Note: If you've already referenced in and animated the regular rig (in this case animRig_Kunoichi.ma), you can replace the reference with the GameReady version without losing the animation**
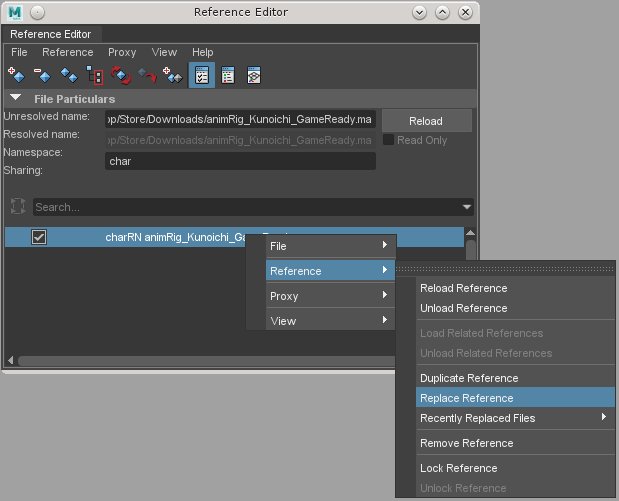
To Switch between a referenced regular AnimRig and a GameReady Rig
1. Maya > File > Reference Editor
2. Select the Rig from the list, right click, Reference > Replace Reference
3. Select the rig variant you'd like to switch to.
Since the controls are the same between the two rigs, the only difference is the addition of a single joint skeleton and duplicate meshes with game ready skin weights, switching back and forth shouldn't be an issue.
5. Once your scene is setup with the GameReady rig referenced in, feel free to animate as desired.
6. Now that the character is animated, you can export it with the kfUnity_AnimExport script
7. Opening the Script
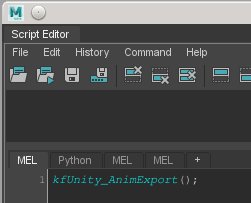
1. Maya > Windows > General Editors > Script Editor
2. Script Editor > History > Suppress Duplicate Variable Messages (For Maya 2015 onward)
3. Script Editor > File > Source Script > Locate kfUnity_AnimExport.mel from the unzipped directory, select it and click 'Open'
4. Nothing will happen when the script is sourced, all this did was load it into Maya's memory
5. Run the follow MEL command in a MEL in the Script Editor (type the command and press 'Enter')
kfUnity_AnimExport();
6. A new UI should pop up, feel free to close the Script Editor
8. From here you can follow the UI instructions, but for more explanation per step continue reading
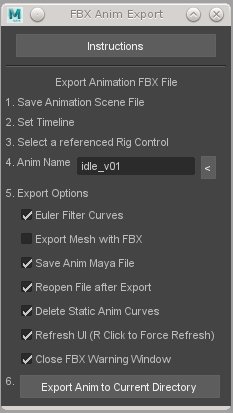
Export Script UI Elements
1. Save your animation Maya scene, the script will not work in a new, blank scene as it needs a directory to export the FBX too which it pulls from the Maya file path
2. Set the timeline to the range you want to export. From this, you could animate the entire animation set in a single file and export them individually by adjusting the range slider
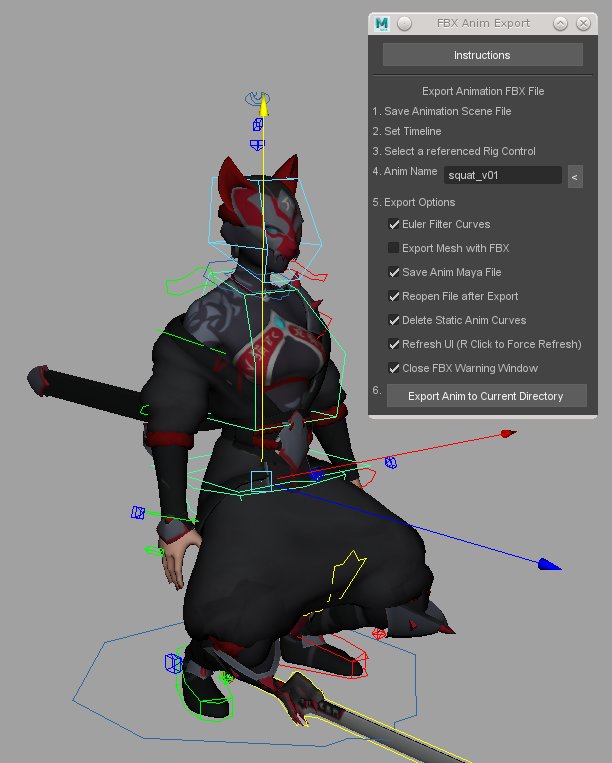
3. Select a referenced Rig Control. Select any control on the rig you want to export, this tells the script which character you want to export incase you have more than one character in your scene
4. Provide a name for the animation, the default is idle_v01. In this example I had the character squat down
5. Export Options
Euler Filter Curves : Since the animation is baked down to joints, this is runs an Euler filter to help reduce gimbal flipping
Export Mesh with FBX : This is off by default, since most engines only need skeletal data per animation since that data is applied to the character FBX
Save Anim Maya File : This saves out a maya anim scene a copy and backup
Reopen file after export : This is on by default, so you can get back to animating. However if you're having troubles exporting, this keeps the baked file open for you to see whats coming out of maya
Delete Static Anim Curves : This is more of an optimization pass to make the FBX's a bit lighter, uncheck if you're having anim blending issues in your engine
Refresh UI : Since the baking process can be slow, I suspend UI updates during the process. However, if theres an issues while exporting this can cause the viewport to remain inactive. If this happens, right click on the checkbox and select the dropdown to force a UI refresh
Close FBX Warning Window : FBX exporting typically pops up a warning window about notifications that aren't really issues, like constraints or skin weights, this closes that pop up window
6. Export Anim to Current Directory, clicking this exports the animation
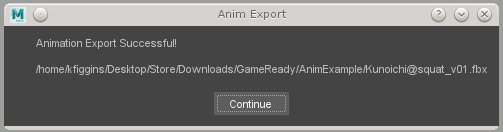
7. The script will export the animation, and a Success window should come up. Click the 'Continue' button
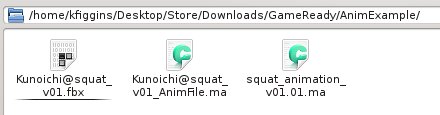
8. Two new files have been created wherever you animation file was saved (Or one one file if you unchecked 'Save Anim Maya File' from the UI)
Getting the Exported files working in Unity/Unreal
Now that the animation is exported as an fbx in your chosen directory, you should be able to load the newly created anim FBX into your engine of choice and apply it to the (rigName)_Char.fbx file (provided in the download of the AnimRig from Turbosquid).
If that page is unavailable here are the listed steps:
Unreal Engine
In unreal you should have 2 separate files to view your animation. A rig file in t-pose and then the animation fbx itself.
Open unreal and select blank project.
Drag your rig (t-pose) into the content directory.
Import All.
Drag your animation into the content directory. Be sure it is using the proper skeleton.
Import all.
Drop your animated fbx onto the stage.
Test.
Unity Engine
Open Unity and select blank project (I usually have a sandbox)
Drag your animation into the assets directory. Depending on how you exported it you may not require a t-pose base rig.
Right-click in the assets directory and create a new “animation controller”.
Name your anim controller something like “playerAnim.anim” or something so that you know which anim it is.
Expand the character hierarchy by clicking the “>” arrow on its icon. You should see one that is called anim.
Double click the animation controller, drag in the animation and link it up however you want. (this will require its own tutorial for more complicated animations)
Click on the character and in the inspector drag the animation controller to the animation driver box.
Enabling Root Motion in Unreal Engine
Most Game Ready Rigs have a 'root mover' control (shown from the CTRL_Vis above the head). Moving this joint makes the root joint move in engine. In Unity, you can say any joint is the the root joint and have the transforms applied in animation. So Unity works as expected. Unreal however requires that your root joint itself be outside the hierarchy to have 'enable root motion' work as expected. Here are the steps to make that possible.
Unreal Root Motion
Troubleshooting kfAnimExport.mel
If you're having an issue, please try the following and let me know when an error occurs:
1. Create a new scene
2. Reference in the goliath game ready rig
-File > Create Reference > Option Box
-Reference Options > Edit > Reset Settings
[x] Use selected namespace as parent and add new namespace string: char
-click 'Reference'
3. On frame 1, select the body control and set a translate key
4. On frame 10, lower the body control so Goliath squats, set another translate key
5. On frame 20, return the body control to 0, set another translate key
6. Set the range slider to 1-20
7. Save the scene file
8. Source and Open the kfUnity_AnimExport script
9. Select the body control
10. Leaving all the settings as default, click 'Export Anim to Current Directory'
Follow those steps and let me know what errors occur.
Using Maya's Built in Game Exporter
In later version of Maya (2016 and up) you can use the built in Game Export, using the steps below
1. Creating the same test scene as before
2. In the Outliner, expand the animRig top group and select Unity_Skeleton group
3. Use Maya's Game Exporter - Maya Guide
4. Try to export the animation from there
5. When bringing the animation into the engine, try ticking the "T0 As Ref Pose" in the Unreal Import settings